miércoles, 9 de febrero de 2011

Remote Assitance: TeamViewer

TeamViewer is a Freeware which is used to remote control another PC, in a fast, simple and effective way.

Installing TeamViewer:

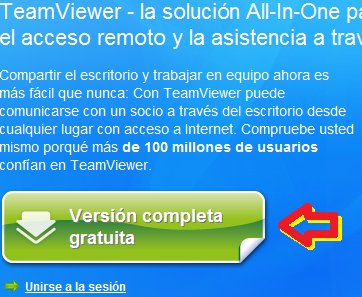
The first step is to download TeamViewer (Here!)


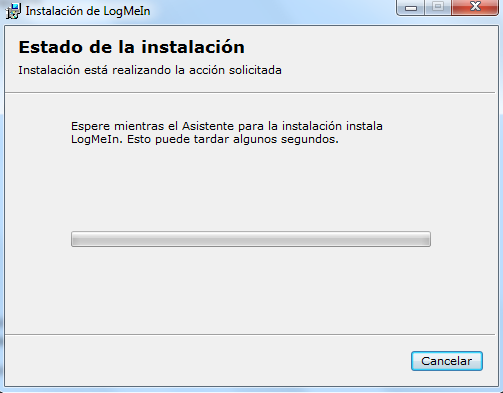
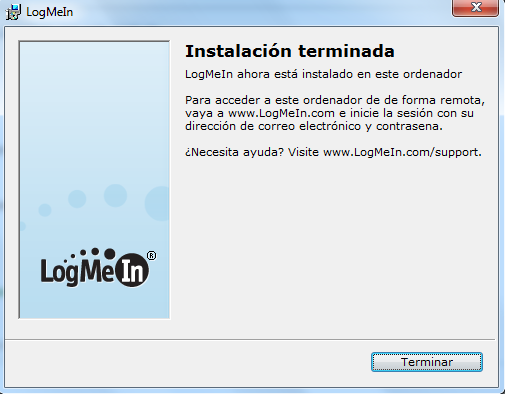
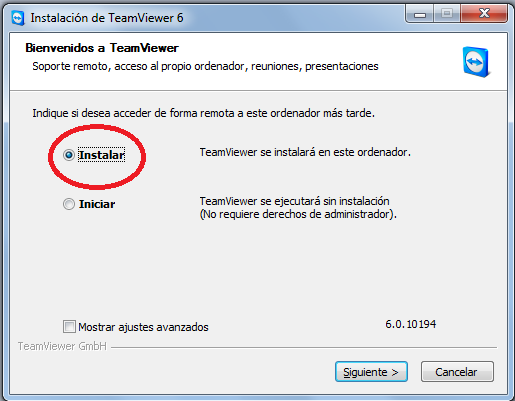
When the download finishes, we have to execute the installer and then a window will appear (Like the following) in which we have to select "Install".


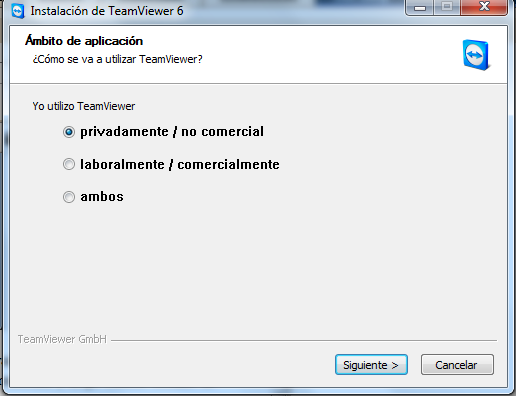
Then we click on "Next", we select the option "Private / Non Commercial", accept the license terms and then we install it with the default options.


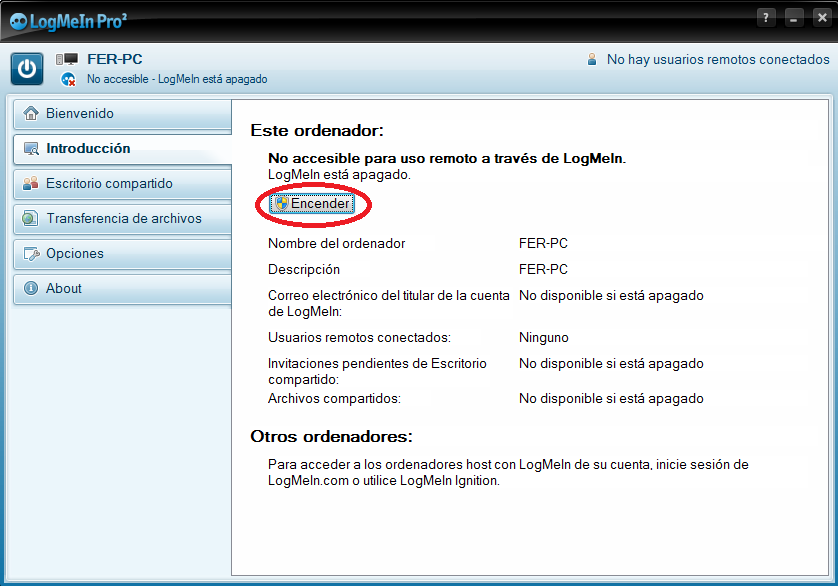
When the installation is over the program will automatically execute and we'll see a window like the following.


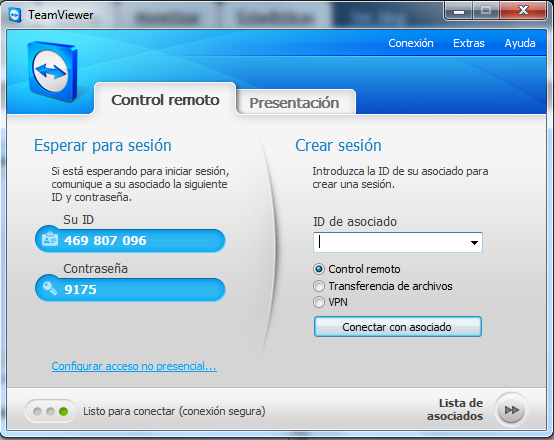
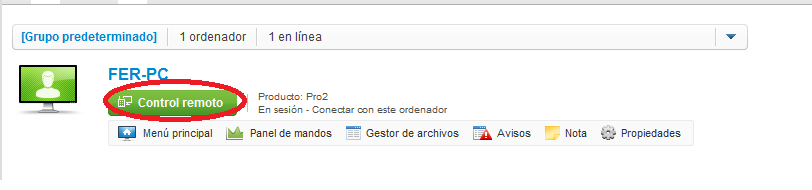
To remote control a computer, we have to writte in the space where it says "Affiliated ID" the ID that appears on the TeamViewer window of the computer that will be controlled, then we click on "Connect with the Affiliated".


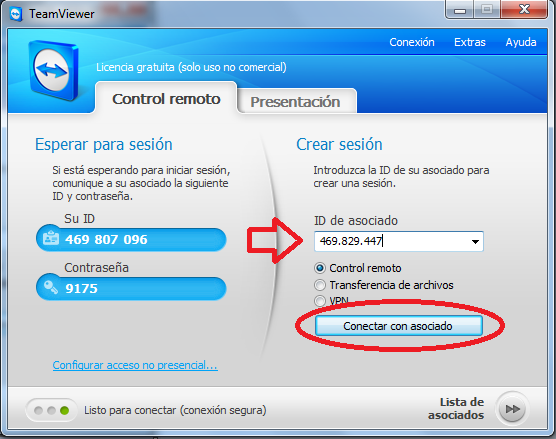
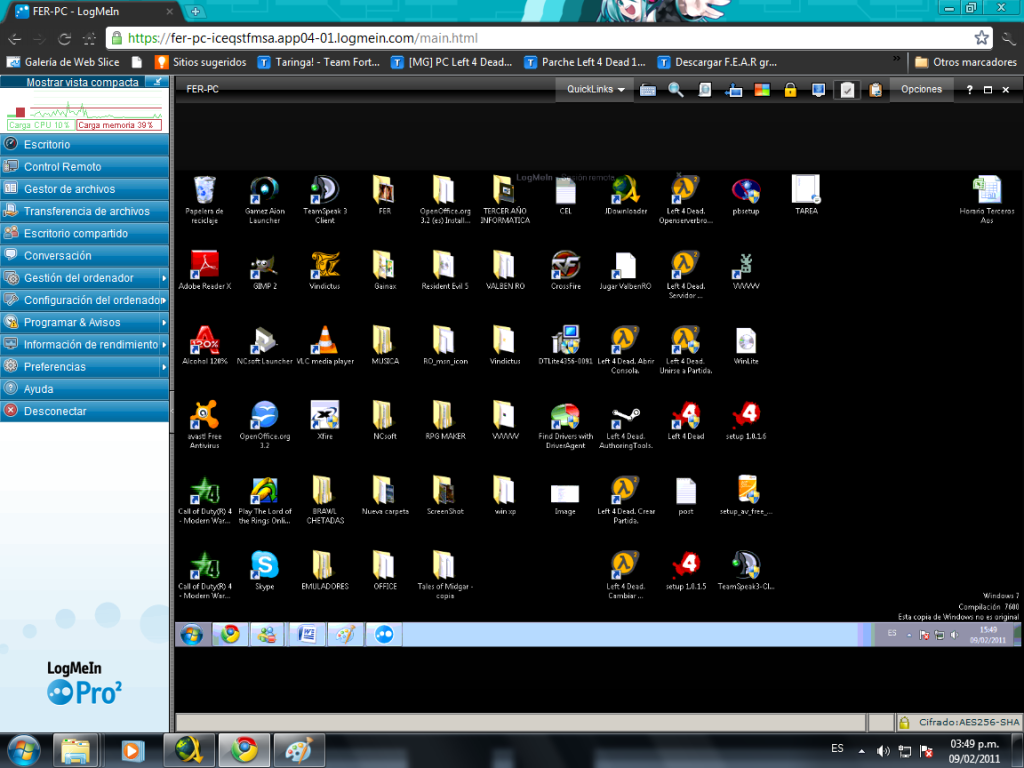
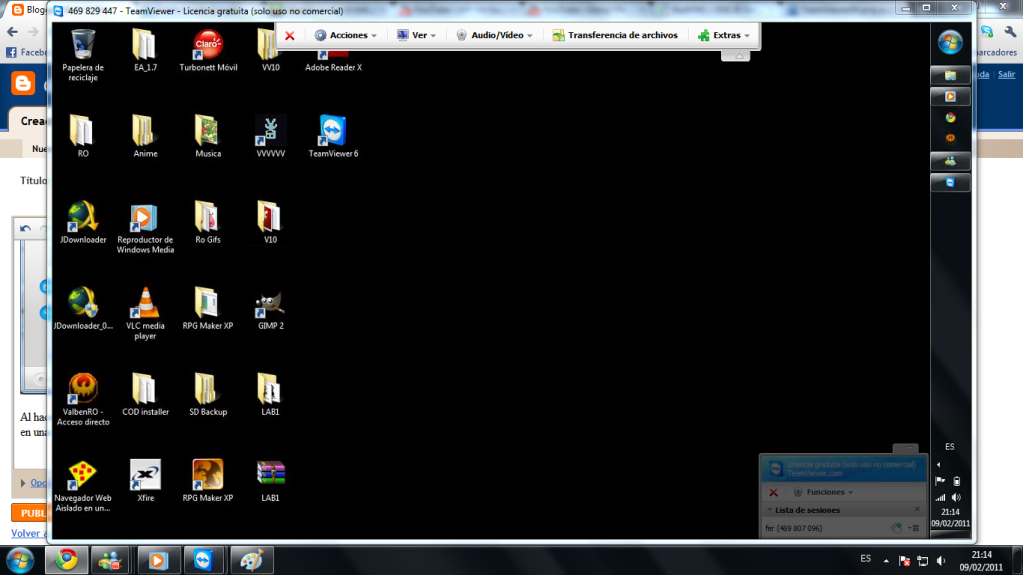
After doing this it will ask for the password that appears on the TeamViewer window of the PC that will be controlled, we type that password and then the other PC will be Remote Controled.

TeamViewer05.png

With this ends the use of the TeamViewer Remote Controller


@Lecturas - 2010


Check this article in SPANISH

Remote Assitance: LogMeIn


LogMeIn is a Freeware that allows the user to remote control another computer. To access to the other computer you need to create an account in its webpage and install the program in the PC that's going to be controlled and the controller .

Using LogMeIn:

To use LogMeIn you only have to follow the next steps:

First you have to create an account in its website(Here!)

Then, after clicking the "Create an Account" hyperlink there are going to appear 2 optiones, "Access" or "Offer", we have to select "Access" (The green square).

LogMeIn02.png

After clicking it, there's going to appear a registration window in which we have to write our account information in order to continue.


After clicking "Continue" we have to write our personal information (Name, Lastname, etc), after doing it we have to click "Continue".


Then the creation of the account will be completed, after that we have to check our e-mail in order to activate our account, after clicking the hyperlink in the activation mail there's going to appear a window like the following:


In this point we have to click "Add Computers" and then we'll start to download the installer of "LogMeIn"

When the donwload finishes, we execute the installer.
                    

When the instalattion finishes, it will appear a windows like the following:


We have to click "Done", then there's going to appear the window of the "LogMeIn" software which by default will come activated with your account, but in the case that it isn't activated we have to click on "Turn On" to activate it. The program should show the word "Accessible" in order tu be used.


When it is "Accessible" it will be ready to be controlled by the other computer.

To control the other computer:

When you log-in on the webpage of LogMeIn, there's going to appear a window like the one below


At this point, we have to click the option "Remote Control"Estando allí, daremos click en la opción “Control Remoto” and then it will connect us to the other computer, if there's an access password you just have to writte it in order to control the other PC.


If all has been done correctly you would be able to control remote the other PC.

@Lecturas - 2010

Check this article in SPANISH    

Wake on Lan: Turning on a PC through a Network

"Wake on Lan" its a technology that comes implemented in the Motherboard of the PC and that feature allows the computer to be turned on by network pulse.


It works as follows, the computer isn't completely off but it's just suspended, in this way it consumes the minimum of energy without being turned off so by using a software that sends a signal to the Network Card it re-activates itself.

Usage Requirements:

To use the Wake on Lan first of all you ned a Network Card that's compatible with the Wake on Lan function, and you also have to activate the Wake on Lan feature on the BIOS setup of the computer.

> First you have to go to the configuration screen of the BIOS, to enter to it you have to press the F1 key while te PC is booting (It can also be the ESC key or another one depending on the manufacturer)

> When you're in the BIOS, go to the "Power" menu.

> In the "Power" menu you have to Enable the "Wake on Lan" opcion, which will allow the computer to be turned on through the Network Pulse.

> You have to save the changes and exit the BIOS Setup.

After configuring the BIOS to be compatible with the "Wake on Lan", you have to configurate the Network Card, to do this you only have to enable the opcion "Wake on Magic Packet". To turn on the computer you have to send the "Magic Packet", this will turn on the computer remotely, for doing so you need a software that has the capacity to do it (For example the "WOL - Magic Packet Sender" or the "Depicus").


     @Lecturas - 2010
     
     Check this article in SPANISH

Network Cabling: UTP Cable (Standard 568A, 568B and Crossover)


The UTP cable is the type of cable that is used more frequently on Ethernet Networks and Telephone Networks, it's also the most common used type of cable for Computing Networking. Usually it's used for networks of medium and short distances, it is also the most common one because of its low prices compared to other types of cable (Like Coaxial Cable or Fiber Optic Cable). In Computing, these cables are more commonly used for conneting a computer to a network or to the internet (By using a Modem or other devices, like a Switch)


To make a Network Cable you need the following materials:

> UTP Cable

> RJ-45 Connectors
> Crimp Tool
> RJ45 Tester

Doing a Network Cable

The most common standards for doing a Network Cable are:

> Standard 568A

> Standard 568B

> Crossover


Cable with a 548A Standard

To do this type of cable we have to place the lines of the cable in the correct order, from 1 to 8 in the RJ-45 Connector (The image shows which pin of the RJ-45 Connector is the Pin #1)


The cables lines have to go in the order that the image bellows shows, when the cables are already placed in the correct order, with the Crimp Tool we have to do a bit of pressure in the RJ-45 Connector until it does a little *crack* sound, when it does the sound we have to check that the cable is steady in its position.

Cable with a 568B Standard

In this standard both sides of the cable have to go in the following pattern, after putting them correctly (Like in the 568A Standard) we have to pressure the RJ-45 with the Crimp Tool until it's steady, remember to always check if the lines of the cable are correctly placed before crimping it.

Cable with a Crossover Standard

In this standard both ends of the cable have to go like in the image below, it's also the only type of cable with different ends (That's why it's called a "Crossed" cable, meanwhile the other ones are known as "Straight" cables)

Like the other 2 types of Standards, after putting the cable lines in the correct order and checking that they're placed correctly, we have to apply pressure with the Crimp Tool until they are steady.

Now, after makint any of the types of cables explained before, we have to check if they are correctly made by using the tester, we place both sides of the cable in the connectors of the tester and if all the lights flashes in a green color, it means that they're all fine, but if a light flahes in a red color, it means that the line of the cable that goes into the pins that the tester indicates are wrongly placed.

@Lecturas - 2010


Check this article in SPANISH

PC Cleaning


These are the steps to clean a CPU (Internal and External) and a Display Screen (External).


First of all, we have to get the neccesary materials for doing the work, these materials are:

> A little Towel
> 1 "Foam Cleaner"
> 1 “Contact Cleaner”
> A little Brush
> 1 Star Screwdriver

Cleaning the Exterior:
> To clean the exterior part of the CPU (Case) and the Display first we have to put a little amount of Foam Cleaner in the little towel and then rub it over the spaces that we want to clean.


Cleaning the Interior:

> First we have to turn off the Switch that's behind the CPU (This step might not always be posible because not all the CPUs have this switch) after turning of the switch we have to disconnect the CPU while we do the cleaning process.

> First of all we have to unscrew the screws of the Case, so the interior part (Motherboard) will be visible. For doing this we have to use the Star ScrewDriver.


> Then we have to disconnect al the cables that are connected to the motherboard, and with the little brush we start dusting the motherboard.


> We'll start by cleaning the RAM (The part that's indicated with the white arrow in the image below.)


For doing this, first we have to move the triggers that keep the RAM held down to the Motherboard, after moving them we carefully remove the RAM, then we have to clean the contact areas with the Contact Cleaner (It is the side of the RAM that goes connected to the Motherboard) also we have to clean the area where the RAM is connected with the Contact Cleaner.
> Then with the same process of cleaning the RAM, we have to remove other parts of the PC and clean them with the Contact Cleaner (Video Card, CD-ROM, etc)


> After finishing with the cleaning, we have to connect everything again and screw the case to it's place, finishing with all the process of cleaning a PC.

 
@Lecturas - 2010 

Check this article in SPANISH